Conventional wisdom dictates that LEGO should be sorted according to their colours. After all, this is how the LEGO company sort their blocks on the pick-a-brick wall. But, I offer that it is the very worst way of organising them, and this blog page attempts describes a better method.
It should be noted that the method of sorting and organisating needs to serve two distinct functions: placing similar bricks together and in close proximity, so a builder can find the one they want quickly and easily when taking them out of the drawers. And, secondly, making it obvious where to place the brick back once it's been removed from the model. The keyword here is 'obvious'. If you can categorize a brick without needing to look up charts, or memorize catalogues, and use only the inherent physicality of the brick, then it's a good system. Naturally, there should be as few rules as possible to minimize complexity, and therefore the chance of error.
This approach solves both halves of the problem, for small standard bricks. Here's part of my drawers, which implement this:
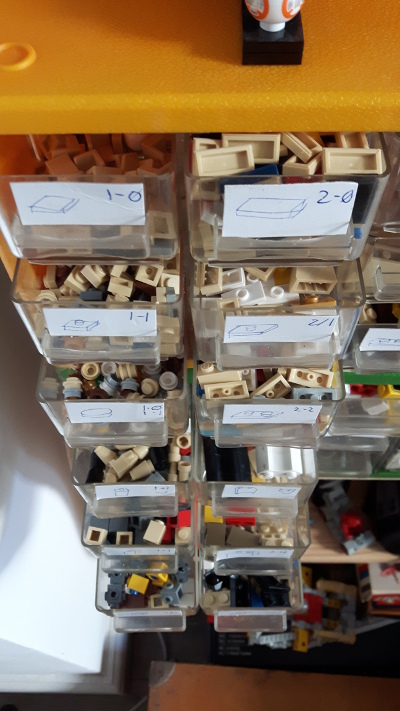
To begin, I should profer why colour is a bad sorting method. Consider this - a person looking for a 2x2 blue brick will find one more quickly when searching a box of 2x2 bricks of multiple colours, than a box composed of entirely blue bricks, of varying sizes. So our first parameter should be size.
Next, we consider how the bricks will be used: building. It might seem obvious, but common sense is rarely common. So, what are the properties of building? Essentially you are stacking the bricks up, so the size parameter is split into two: how large is the base are building on, and how large is the top area. This order places the base size first because we generally build upwards, and so we know the size of the piece underneath it, before needing to know the number of studs of the piece above it.
Describing bricks using just these two parameters is very insightful. We can use 1-0 as a way of quantifying the flat smooth bricks, and 1-1 for their studded versions. We don't need to specify the size as 1x1 as there's no other size a 1-0 brick can be. The same is true for 1x2 (or 2x1). Even bricks with 3 studs only have two variations in LEGO: a straight line, or an L shape - and these can be easily distinguished by eye, and so don't need extra categorisation. (Although you could separate them if your collection is very large.)
So, these two simple rules gives us an organisation matrix of:
| Base size-> v top studs |
Base 1 | Base 2 | Base 3 | Base 4 |
| -0 : Tiles | 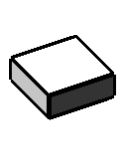 Code: 1-0 | 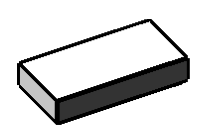 Code: 2-0 |  Code: 3-0 | 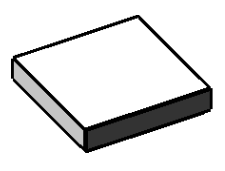 Code: 4-0 |
| -1 : Plates | 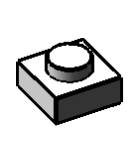 Code: 1-1 | 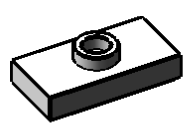 Code: 2-1 |  Code: 3-1 | 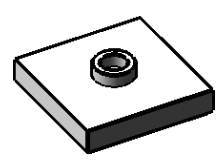 Code: 4-1 |
| -2 : Plates |  Code: 1-2 | 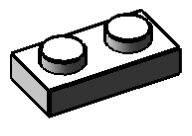 Code: 2-2 | 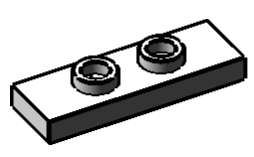 Code: 3-2 | 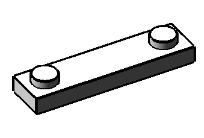 Code: 4-2 |
| +1 : Bricks | 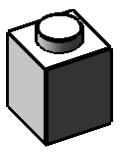 Code: 1+1 |  Code: 2+1 |  Code: 3+1 |  Code: 4+1 |
| +2 : Bricks |  Code: 1+2 | 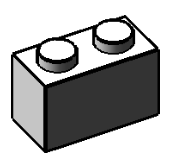 Code: 2+2 |  Code: 3+2 |  Code: 4+2 |
| +2 : Angled/SNOT |  Code: 1+1s | 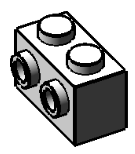 Code: 2+2s |  Code: 3+3s | 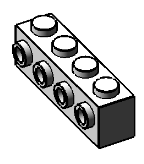 Code: 4+4s |
| +n : N-Shaped |  Code: 1+1o | 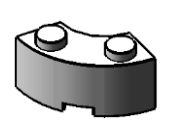 Code: 2+2o | 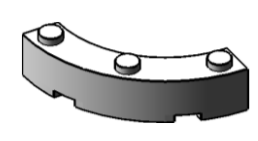 Code: 3+3o | 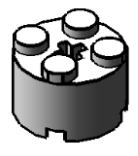 Code: 4+4o |
Obviously, some drawers will be empty, or have very few bricks. That's fine. The space allows for quicker retrieval, and can always be used for overflow pieces from the category above/below. (Plus, they might exist in the future.)
Notice we have supplemented the basic convention with a symbol (- or +) to indicate the type of brick, and suffixed it with a letter to indicate how the brick deviates from the base to the top.
We use the -/+ symbol to indicate height. Flat pieces first, and solid bricks second. Then, we can add the more esoteric categories of curves and angles. Curved bricks do not need to be in a category of their own, since a 1-1 rounded stud is visually very different to a 1-1 square brick and so, just like the logic for not ordering by colour, we don't need to sort them. However, there are several variations of curved brick that would look out of place in the same compartment so we rephrase 'curved' as 'shaped' to neatly include them all.
The symbols:
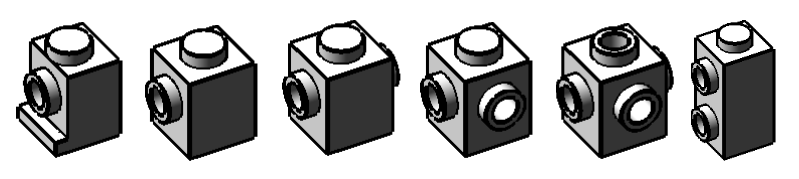
From here we can quantify 'angled' bricks. These will be any brick, with the given base size, that have their opposing studs on a side which isn't only the top. There are several L shaped bricks which fit this pattern.
NOTE: LEGO often refer to this type of brick as SNOT - Studs Not On Top. However, I find that description inaccurate because there are often studs on the top in addition to the others. Therefore, to avoid coining SNOOT (Studs Not Only On Top) I avoid any potential confusion and refer to it as simply 'angled'. This allows other pieces that connect at angles, albeit without studs, to be included as they serve the basic building purposes.
The suffixes:
Similarly, builders with a lot of SNO(O)T bricks, might add a suffix to differentiate these
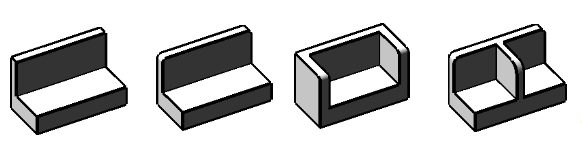
1+1s bricks:
Furthermore, it's fully generalised, so new bricks can be introduced to the range but
still use the same categorisation system. So this brick:
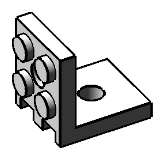
can be quantified as 4-0s, since there are 4 studs on the bottom, none on the top, but some
side connections which qualifies it as SNO(O)T.
Notice how the symbols chosen are 'filename friendly', eliminating any chance of Bobby Tables appearing in our collection! I wish more systems did this!
Also note that there is no attempt to categorise this specific 4-0s as different to the others because, as before, they can be easily determined by eye. Plus, if you look at the brick it is trivial to note that both should be filed under 4-0s, and no extra thought or logic is needed to find or categorize it.
Anything over a 4-stud base is generally easy enough to find amongst a large pile of LEGO. (I am convinced the miltary could find more needles in haystacks if they asked LEGO builders to look, since they can spot a blue 1x2 tile at 50 paces!) However, should you wish to logically order them (as I do with my technic LEGO spindles) then I recommend you match them in triples, such as 4, 8, and 12, and store them together. After all, no one is going to mistake a 4 brick with an 8- or 12- studded brick.
Additional bricks, like doors and windows, are not considered in the matrix because they don't physically fit in the drawers I have! Although, since they fit the pattern of 3+3 they could be added.
Wheels and minifigs are similar insomuch as they can be easily quanitified - albeit by a different method. In the case of wheels I divide them into 'has their own spindle' and 'does not have their own spindle'. And minifigs are separated into bottom, tops, neckwear, heads, caps, and hand-based props.
The base-top pattern is a basic starting point. Any bricks with 3 or more base studs could be split into separate drawers to describe their shape.
I have an extra drawer for 1-0 and 1-1 round pieces because there's no 1-2 pieces in my collection, and I have a lot of these 1-0 bricks.
Finally, if you have a lot of space, there is no reason why you shouldn't have multiple drawers for each element in the matrix. Perhaps then it is sensible to sort them by colour. Or separate drawers for solid bricks, and another for translucent. Maybe you have drawer dividers for this purpose? (I do!) Or to distinguish between different angled styles, as shown above, with separation drawers for '1 side stud', '2 side studs', '4 side studs', and so on.
Ultimately, this document isn't meant to be prescriptive. It's meant as inspiration to help provide a fresh perspective on ways to organise your own LEGO collection, no matter how large or small!
 Marquis de Geek